The introduction of Figma Make marks a fundamental shift in how we approach the "blank canvas" problem. By utilizing sophisticated AI models to interpret intent, the tool doesn't just draw shapes; it understands the structural requirements of a user interface. This allows teams to bypass the repetitive manual labor of early-stage wireframing and jump directly into high-fidelity exploration. It’s no longer about building from scratch - it’s about directing a powerful system to materialize your vision.
Indicate all the details in the first prompt
Precision is the secret to high-velocity AI workflows. The more granular your initial instructions, the less time you’ll spend in iterative loops. Think of your prompt as a creative brief: the more "front-loaded" your context, the more accurate the output. To achieve a production-ready result on the first try, your prompt should define:
- The Mission: The specific objective you want Figma Make to accomplish.
- The Ecosystem: Where this screen lives within the broader user journey.
- The Anatomy: Essential UI components and aesthetic requirements.
- The Logic: Precise interaction patterns and state changes.
- The Parameters: Specific constraints regarding viewport, grid, and style.
By refining your vision before you type, you transform the AI from a simple tool into a high-fidelity partner. For those looking to push the boundaries, consider using a secondary AI assistant to "up-level" your prompts - generating sophisticated descriptions and specialized code snippets that can be dropped directly into your workspace for high-end effects.
Refine your source files before you prompt
Figma Make isn't just a "from-scratch" generator; it acts as a powerful translator for your existing design library. However, the sophistication of your interactive prototype is directly proportional to the quality of the source material you feed it. Before you copy-paste a frame into the prompt interface, prioritize canvas hygiene. By eliminating redundant layers and flattening unnecessary groups, you provide the AI with a high-fidelity blueprint rather than a cluttered puzzle.
While aesthetic polish is important, the structural integrity of your file is what truly dictates success. To ensure a seamless migration into functional code, focus on these core areas:
- The Auto Layout Mandate: Correctly implemented Auto Layout and frame constraints are the primary signals Figma Make uses to understand responsiveness and hierarchy.
- Semantic Naming: While the AI is intuitive, labeling layers by their function (e.g., "Primary-CTA-Button" vs. "Rectangle 12") provides an extra layer of context that helps the model assign the right logic to the right element.
- Automated Cleanup: You don't have to do this manually. Leverage native AI tools like Suggest Auto Layout and Rename Layers, or utilize community plugins such as Clean Document to audit your frames in seconds.
It is common for the AI to interpret your design dimensions with absolute literalism, which can sometimes result in layouts that bleed off the edges of the preview window. If your translation feels "out of bounds," use a strategic follow-up prompt to recalibrate the viewport. Phrases like "Refactor this for a responsive mobile container" or "Scale the layout to fit a standard 1440p desktop screen" will force the model to re-evaluate the spatial constraints without losing your design intent.
Map out your project in bite-sized milestones
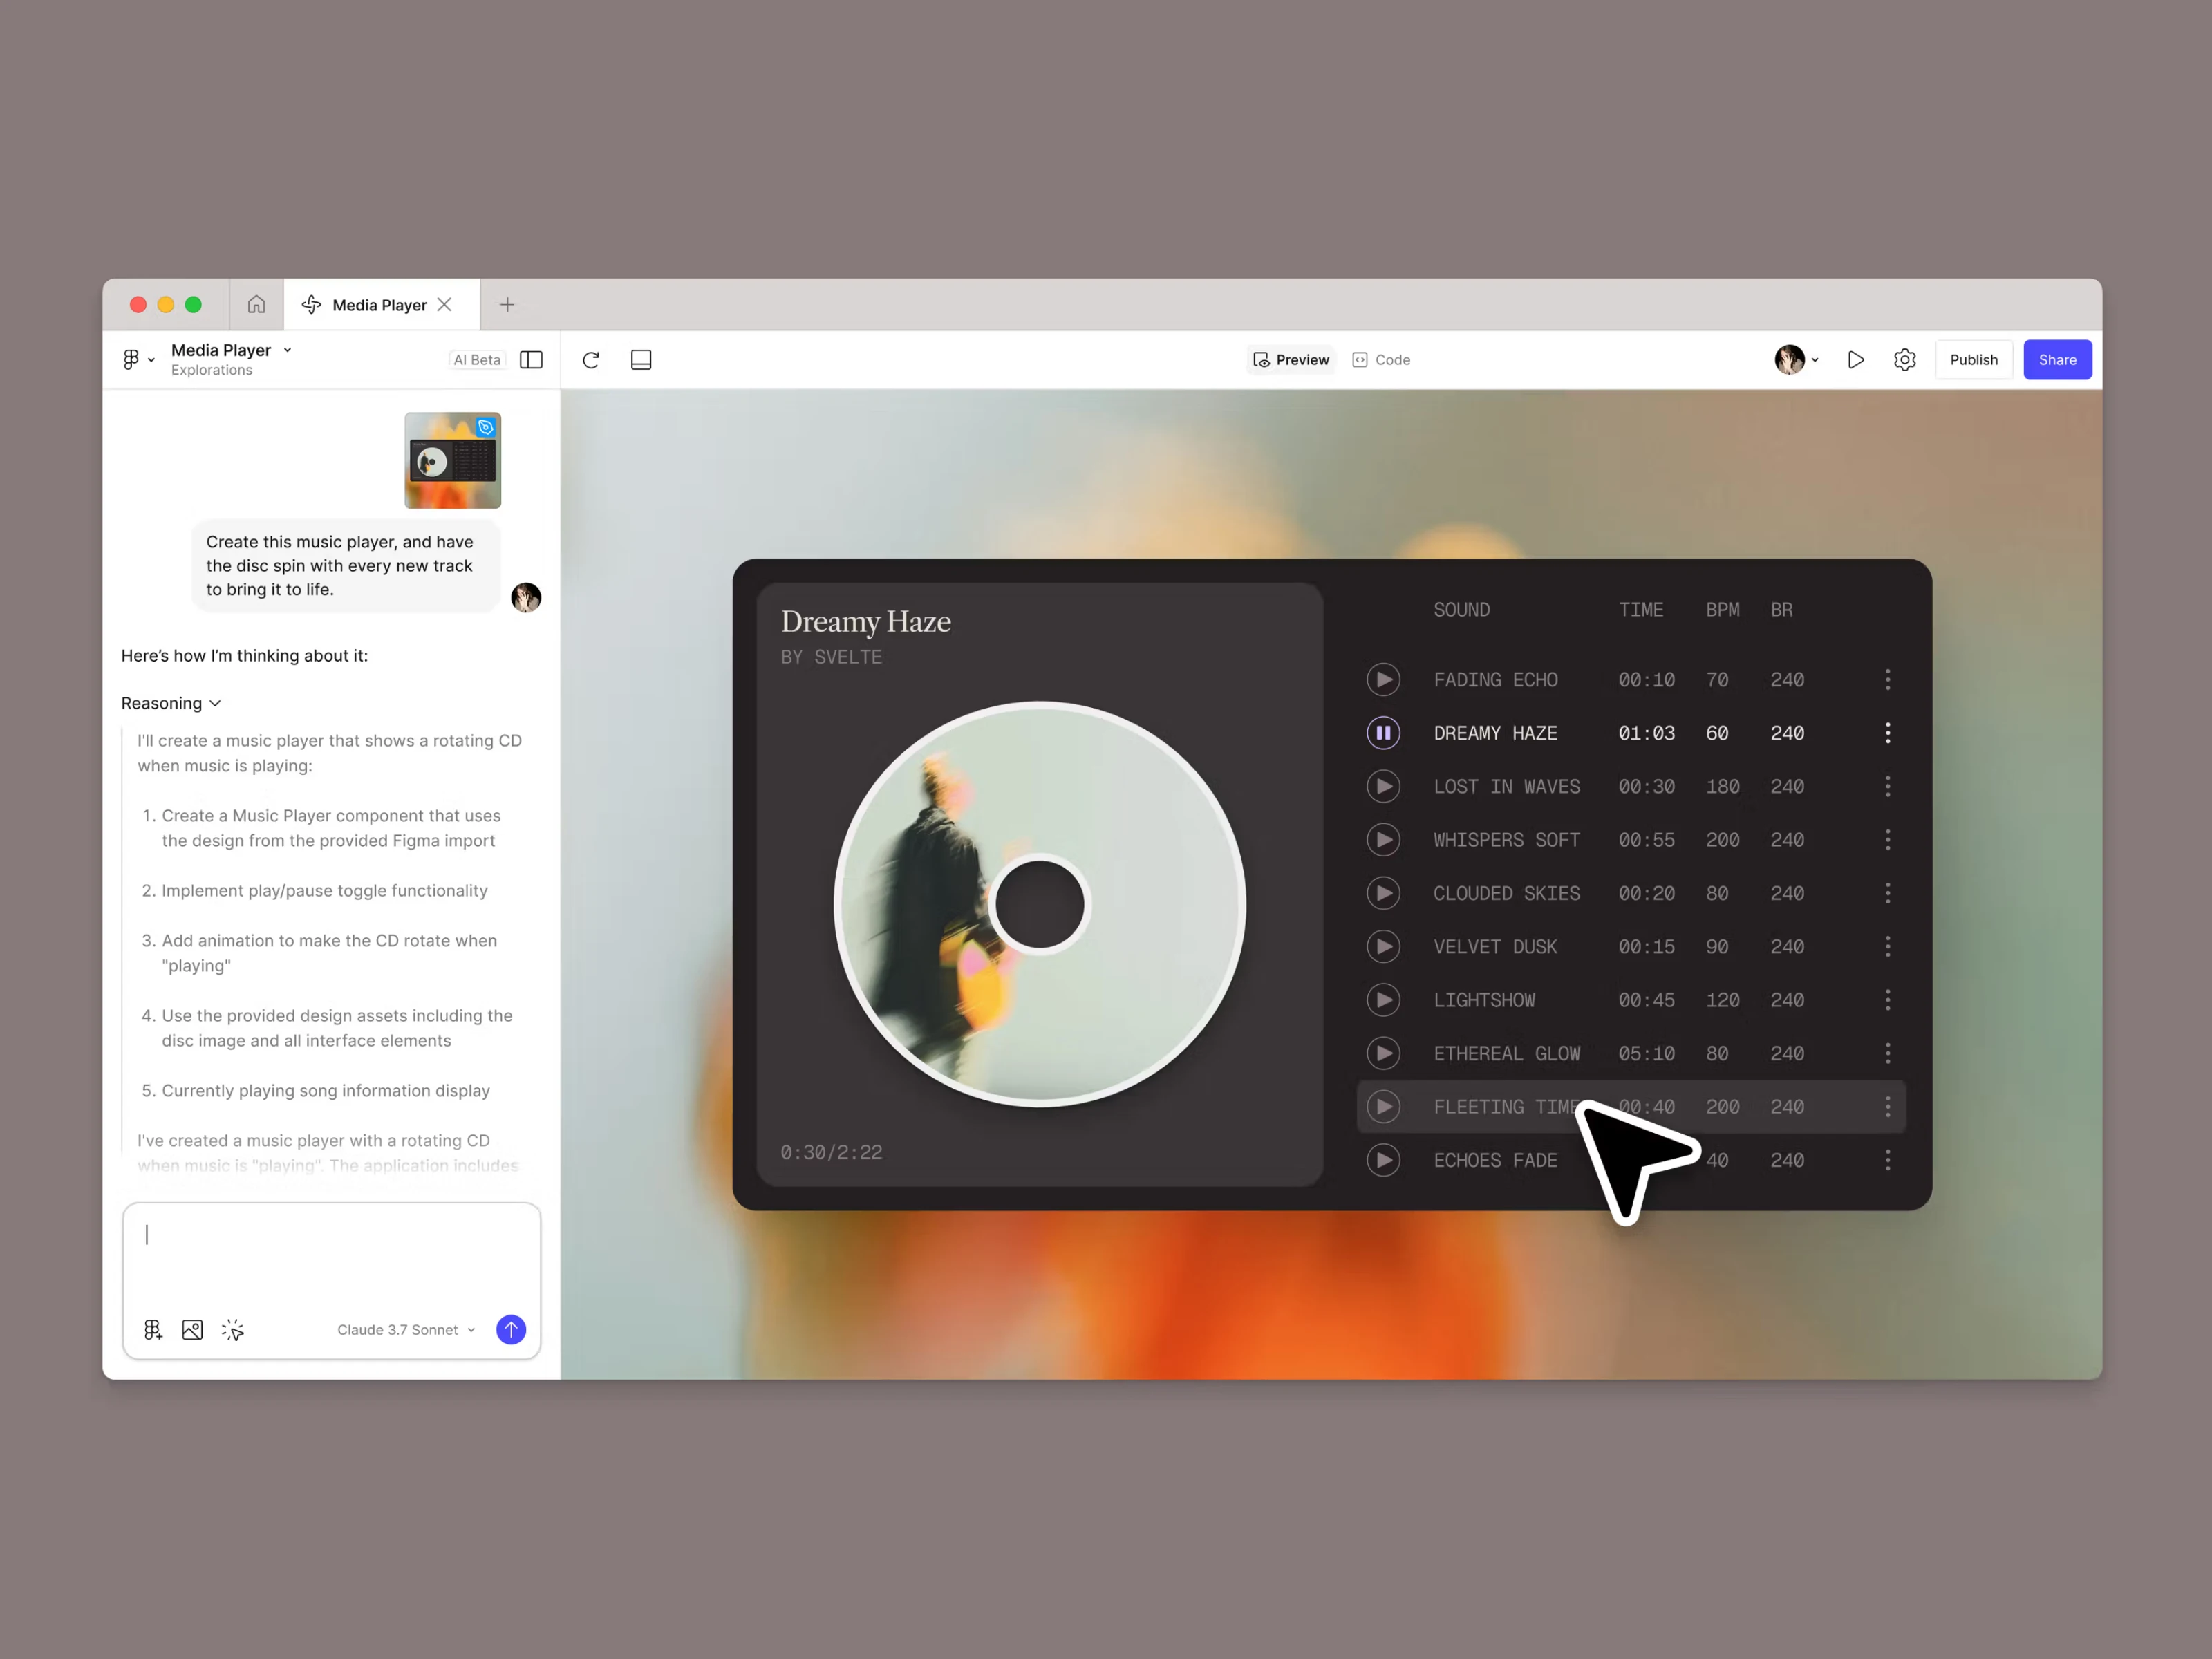
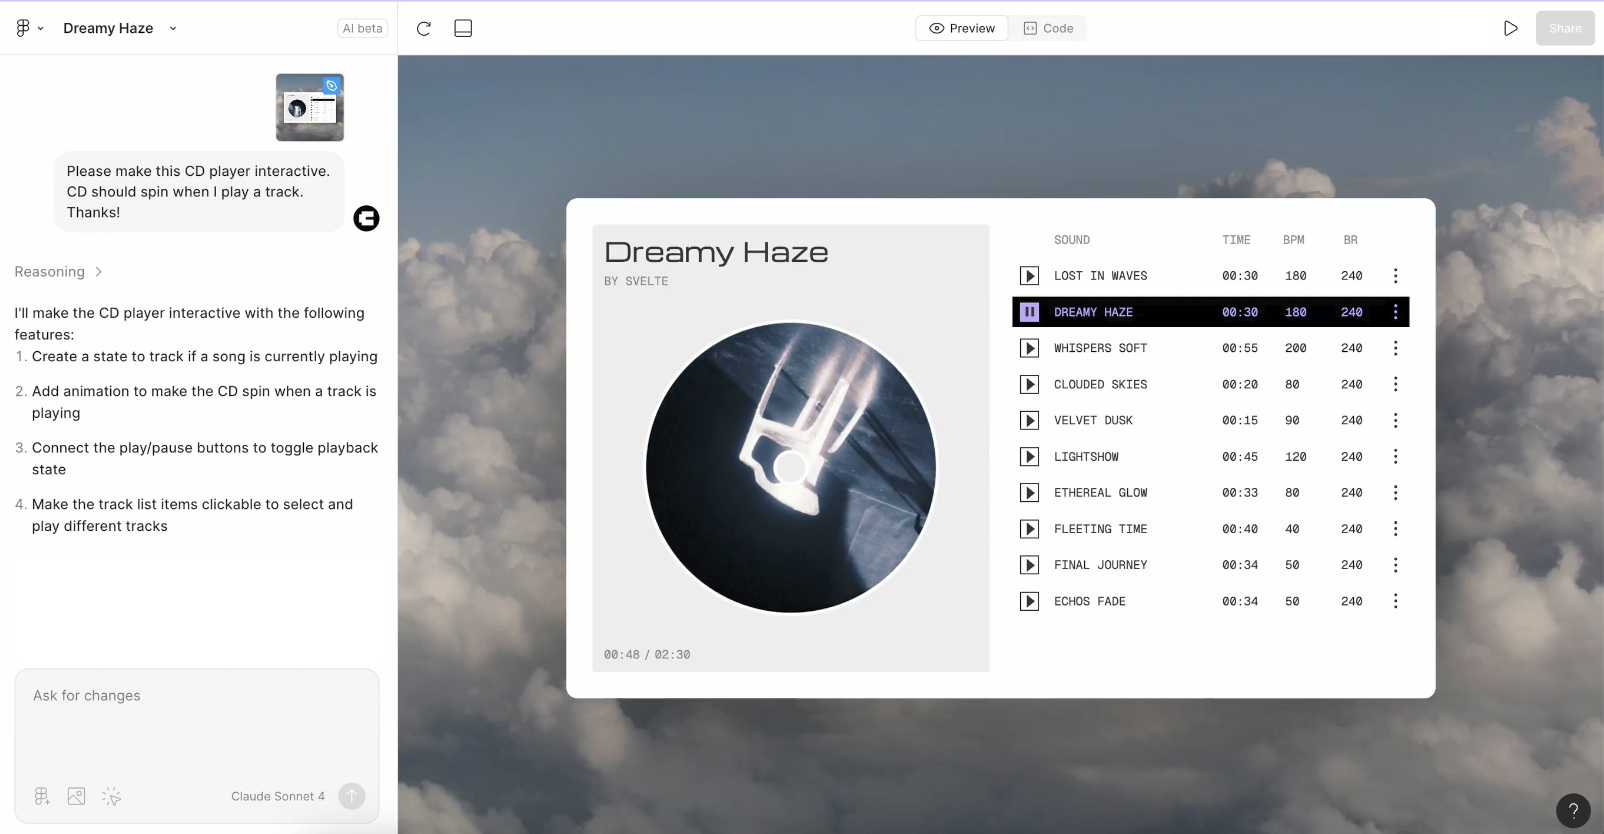
Even the most flawless initial prompt is rarely the final word for a high-complexity build. To achieve peak performance, you must shift your mindset from "one-shot generation" to incremental refinement. By isolating specific adjustments into smaller, targeted follow-ups, you provide the AI with the focus necessary to execute with precision. As Product Designer Tammy Taabassum observes, “The tighter the scope, the higher the resolution of the LLM’s output.” The efficacy of Figma Make is a direct reflection of the clarity and granularity of your requests.
Once your primary prompt has established the foundational architecture, treat subsequent edits as surgical interventions. Rather than overwhelming the model with a laundry list of fixes, evolve your interface frame by frame and interaction by interaction. This step-by-step methodology doesn't just improve the technical output; it preserves your creative agency, allowing you to audit the design’s direction at every milestone before complexity compounds.
Pro-Level Tip: Folder-Based Isolation
For those managing ambitious, feature-heavy builds, you can optimize your codebase by explicitly instructing Figma Make to structure elements into distinct code folders. This strategy enforces a modular file system, which serves three critical purposes:
- Enhanced Maintainability: It keeps your project organized as the prompt history grows.
- Error Isolation: If a specific component breaks, the bug is contained within a single directory rather than the entire build.
- Logic Clarity: It forces the AI to think about your app as a series of interconnected services rather than one massive, unmanageable file.
Scale your vision without sacrificing consistency
One of the most effective ways to bypass the "generic AI look" is to feed Figma Make your existing library assets. By copy-pasting your own components—which already carry the DNA of your Auto Layout structures and naming conventions—you provide the AI with a high-fidelity blueprint. Because these elements are already architecturally sound, they translate into functional code with much higher reliability than raw shapes or unorganized groups.
Beyond just using components as building blocks, you can treat them as style anchors. When you drop a component into the prompt box, Figma Make analyzes its spatial logic, padding, and aesthetic properties. It essentially "learns" your design system’s rules through visual observation. This allows the AI to generate new layouts that mirror your brand’s specific density and visual rhythm without you having to write a lengthy technical manual for every new screen.
Pro Tip: The "Point-and-Swap" Workflow
Don't settle for the placeholder UI that Figma Make might generate in its first pass. You can perform surgical upgrades using the Point and Edit feature:
- Identify a generic element in the live preview.
- Paste the high-fidelity component from your library directly into the prompt box.
- Issue a precise command: "Refactor the selected element to match this design exactly."
- This method allows you to rapidly "skin" a prototype, replacing AI-generated stubs with production-ready components from your actual design system.

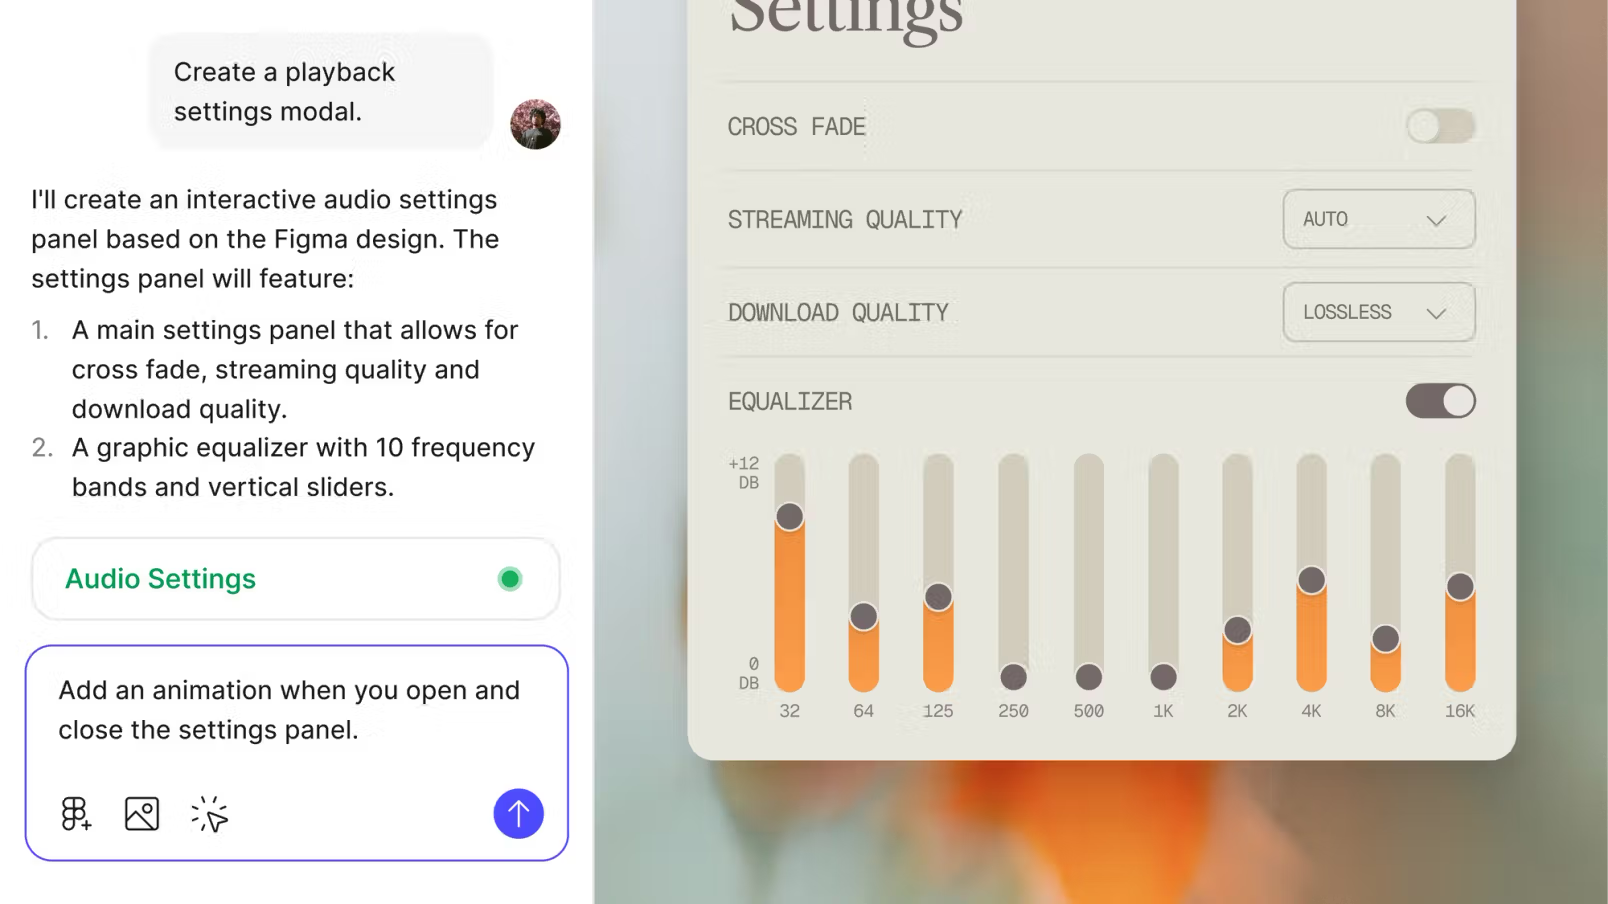
Elevate Prototype Fidelity with Dynamic Data Integration.
Static mockups often fail to capture the true user experience because they lack the unpredictability of real information. Figma Make bridges this gap by allowing you to populate interfaces with dynamic data—ranging from live financial tickers to localized weather updates. However, achieving this "live" feel doesn't always require a complex backend integration. You can simulate sophisticated data environments directly through the prompt interface while keeping your project secure.
Strategies for Data-Driven Prototyping
To protect your sensitive information—such as private API keys or proprietary secrets—we recommend simulating data streams rather than hard-coding third-party credentials directly into prompts. Here are two secure ways to build data-rich experiences:
Generative Data Seeding: Simply describe the specific categories of information you need (e.g., "Populate this list with realistic e-commerce inventory, including varied prices and stock levels"). Figma Make will generate a representative dataset that mirrors your requirements.
The "Entry Point" Method: Instruct Figma Make to build a dedicated data-import interface within your prototype. This allows you to manually inject or "upload" granular datasets during a live demo, giving you total control over the variables without exposing the underlying code.
Pro-Level Insight: Hardware-Integrated Interactions
The potential for realism extends beyond text and numbers. Because Figma Make operates within the browser, it can interface with any hardware your browser has permission to access.
The best prompts are found through exploration. Now that Figma Make (Beta) is available to every Full-seat user, the transition from idea to execution is faster than ever. We’re excited to witness the next wave of innovation as you bring your unique visions to life on the visual canvas.


